How to use the Editor
Using the software is very simple. This little guide is a help to quickly build your new website
providing you with all the basic information.
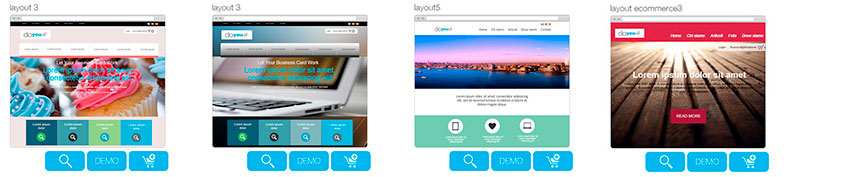
Go to the page Templates browse through free templates, choose the template you like.
Click the lens button  to view the full screen template.
Click the DEMO button  to access and edit the template, enter the
your email (any email) and access the site. Wait for template installation times.
to access and edit the template, enter the
your email (any email) and access the site. Wait for template installation times.
Click the Edit Graphic button and access the template to customize the graphics of your new website.
You are now on the free DEMO to customize. Any changes you make will be retained on your website if you decide to confirm the service.

The interface
The software use Drag and Drop technology.
You can move content within the web page simply by dragging the mouse, inserting or creating new content.
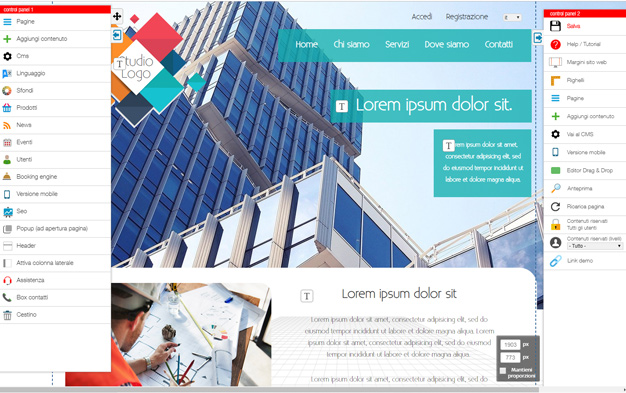
The interface is made up of two large menus.
By the one on the left of the screen you can enter content,
insert the modules (products, news, travel, structures,
receptions, properties, events etc.), manage graphics, create / edit pages, activate and manage the side column,
access the CMS (management software) and Mobile version.
With the right one you can save the changes to the template, view the preview,
access the tutorial, activate the rulers.
Create a template
The website is made up of many graphic and textual elements (contents): logo, navigation bar, slideshows,
texts, images, buttons, background colors, etc.
How do I edit my website?
Each template is made up of content that you can move, edit
or delete. You can delete all content and create a new template from scratch (white page).
How do move content?
Position on the content, hold down the left mouse button and move the content.
Releases the content to the position you want.
How do I edit content?
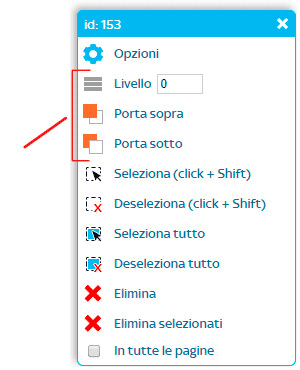
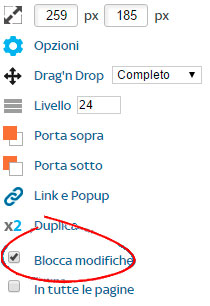
Place the mouse cursor over the content, right click to open the navigation menu (see image).
Click the Options button to access content settings (size, location, color, fonts, backgrounds, texts, images, etc ...).
Edit the content as you wish.
Click the Save in Content Options button to confirm the changes
How do I delete content?
Locate the content, right-click. Click the Delete button on the menù which appears.
You can delete all the content on the template. Entering new content is
very simple and quick.
Duplicate a content
You can create one or more copies of a content.
Place the mouse cursor on the content, right-click to open the navigation menu (see image).
Click the Duplicate button.
Content is duplicated, you can move it or modify it as other template content.
How do I insert a new content?
To insert a new content, use the left menù on the website.
Click the button  to insert a new content.
You can enter texts, images, forms, shapes and pngs, menù (navigation bar), rotating images, photogallery, menù vertical and horizontal,
buttons, videos, Google maps, pop-ups, tables, files, html code, scrolling text, social network links, newsletter and clock links.
Content Position (levels)
The contents are arranged on the template as sheets on a table.
Sheets represent Layers. Content that is on a higher level (above the others) will be displayed in full,
the others below will be displayed in part or not at all.
Using Layers you can compose complex and very beautiful graphics.
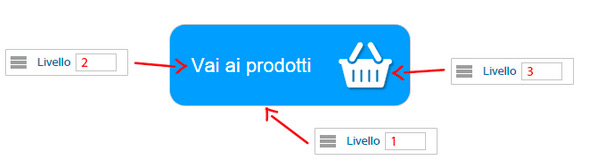
For example, if we wanted to create a banner we could create a box (rectangle) at level 1, the text above the banner on layer
2 and the button on leyer 3.
Change the level
Place the mouse cursor over the content, right-click
to open the navigation menu (see image).
Enter / modify the level value.
Use the Up and Down buttons to move the location of the content to the template.
Close the menu by clicking the X at the top right, Save Template.
Save the changes
It's very important to save your changes often to not miss the changes made to the template,
Also remember to save before changing or closing the page.
You can save the changes by sfturing the save button on the right side menu (image).
Or, if you are in a Content options panel, you can save it by using the button.

Multiple selection
To help you create your template, you can select multiple content and move them simultaneously.
To make multiple selections, hold down the left mouse button and drag it over the content you want to select.
Alternatively, you can hold down the SHIFT key on the keyboard and click on the content you want to select.
The selected content will have the red selection area (image).
Once selected, the contents can be moved and placed at the same time.
To clear everything from double left mouse click on an empty page area.
Some things to know before making the website
Usually the Logo and navigation menus, often also large rotating images, form the
header, that is the headline of your website, the top part of the site that is repeated on each page.
The lower part (closing) is the Footer where you can find business data,
contacts and social networking links (even the footer is repeated on each page).
The central part of the website where you enter content is the Page.
It is usually white, but you can customize it with different colors or backgrounds.
What should the size of the website be?
It is important to use a maximum size of 1200 pixels in width, vertically there are no limits (always better not exaggerate).
Then, make your page in a space ranging from 0 to 1200 pixels so that the website is compatible with most
screens and resolutions used at this time. What you see on the PC home screen, probably,
it will not be the same as what your neighbor or your customer will see from his PC.
To understand size of worksheet (your website) click RULER button
 present in the right menu of the template near the edge of your screen.
Activate the Rulers, click with the mouse on the 0 value of the ruler to the left of the screen and then the value 1200 to the right.
The two lines that appear on the screen define the space in which to insert the content on the pages.
If you want to use full-screen content (images, wallpapers, menus, footers or more),
obviously we will no longer consider the space delimited by the rulers of the rulers,
but you can go further and use all available space.
How to determine the Header, Page, and Footer spaces
As we have previously described the website page and all the pages that make up it are divided into three main sections:
header, page and footer.
The header is the top part of the site (header) where the logo is usually found,
the menu (navigation bar) and often the slideshow images (slideshow).
The page is the space where you enter the textual information and images, the contents that make up the pages of your website.
The Footer is the lower part of the site at the end of it, where you enter corporate data, contacts, and links to social networks.
The software does not know where the header begins or ends, or where our pages start. You have to manually set the spaces in order to
get a proper view of your website.
Click the BACKGROUNDS, HEADER and FOOTER button in the left menu

Click Header button,
 changes the Header height value.
Above the dotted line you can enter all the contents that form the header and that will be repeated on all pages of the website.
From the dotted line begins the Page where you can enter the contents of the pages of your website.
Click Footer button
 to access the Footer options.
You can change the size, enter text, photos, and links to them
your social network.
Fade effect of contents
With the fading effect, you can enrich the website with effects of moving content at the opening of the pages.
For example, display after the page, logo or menu, or the other elements that make up the page.
Go to content options.
Click the icon at the top right
 and access the settings
for fade effect.
Activate the effect, choose the fade tip and set the values.
Click button Test Effect
to get a preview of the desired effect.
.
Footer (bottom page)
The Footer is located at the bottom of the pages closing the website.
In the Footer you can only enter a logo or enter business data and other content.
You can enter the sitemap, images, texts, links to social networks, etc.
Go to the footer content and right-click to access the options.
Changes the footer size in width and height based on the content you want to insert.
Check the checkbox
Width 100%
to have a full footer across the entire webpage, modify the color, border, and so on.
In the Footer you can enter texts, images and links to social networks.
To enter texts, use Columns.
Indicates the number of columns (max 3) in the footer settings.
Click the button at the top with the icon
T
edit text
to access column 1.
Indicate the content you want to import and click the save button. Change the size and position.
To edit the columns text, go to the Footer, click the icon
T
edit text
and access the formatter to modify the content.
To insert an image into the footer, click the Photo 1 icon.
Check the checkbox
View photo 1
to activate the image, click
Upload photo
to upload a new photo, change the size and position and enter the link (optional).
You can enter up to 4 images.
To link to Social Network, click the Social Icons icon
Enables the icons you need, changes the size, position, and borders. Always click the save button.
To link the selected icons to the Social Network links click the button
Social network link management.
Copy and paste the links into the appropriate spaces.
Blocks contents
Where you've placed the content, if you think they are in the final position, you can lock them in order to avoid being moved accidentally.
Right-click the content you want to block, click the checkbox "Block Changes".
From this moment on, the content can no longer be moved.
You can lock and unlock content as often as you like.
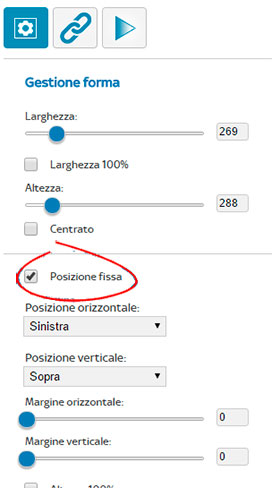
Fixed content position
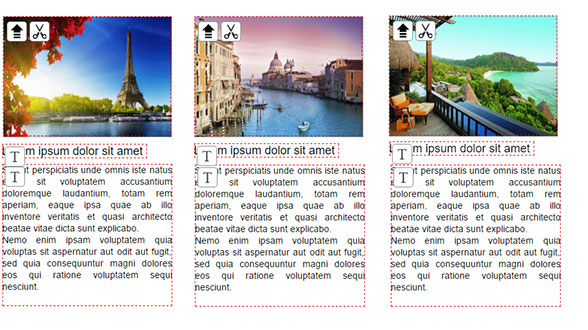
You can lock the contents in a fixed position, ideal for making some photo templates (image).
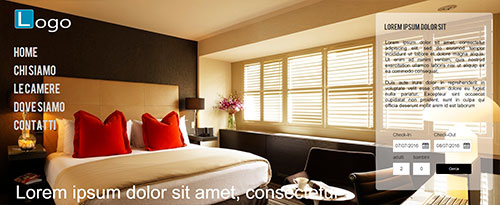
In this case, the logo and menu have been locked to the left, and will be displayed in this location regardless of the resolution used.
Box and text are locked to the right.
To block a content by accessing the options by right-clicking and clicking options, tick the "fixed position" item, handle the side
in which you want to block the content, move it to the desired position using the sliders.
Content set as a fixed position can not be moved by dragging it with the mouse.